Spring fever has hit not only our backyard, but also the kitchen. I decided that I was in the mood for recipe that I hadn't made since last summer - Caprese Pasta.
This truly is a (less than) 30 minute meal. It is super easy and oh-so-simple to make. Just a few ingredients and you've got yourself a delicious, filling meal. I normally serve it with fresh bread, but I completely forgot to make the bread!
(Yeah, I'm not sure how that happened either....)
Of course, if you have fresh garlic, tomatoes, and/or basil from your garden, it will only make this meal better. The next time you're looking for an easy, fast dinner, give this a try!
Caprese Pasta
Serves 4
Ingredients:
12 oz pasta
2 tbsp olive oil
2 pints cherry or grape tomatoes, sliced in half vertically
2 large garlic cloves, minced
8 oz fresh mozzarella, diced
1/4 cup fresh basil, chopped* - plus more for garnish
Kosher salt and Pepper
Balsamic vinegar
Directions:
1. Bring a large pot of water to boil and add a few good pinches of salt. Add pasta and cook a few minutes less than directed - you want the pasta to still be al dente. Drain pasta, reserving 1 cup of the pasta water. Set aside.
2. Heat a large skillet over medium heat and add the olive oil. Once oil is warm, add the tomatoes and saute for 5 minutes until they begin to soften. Sprinkle the tomatoes with salt and pepper and add in the garlic. Continue to saute for about 10 minutes (I do this while the pasta is cooking), stirring occasionally. The tomatoes should begin to get softer and release their juices, making a 'sauce'.
3. Once the tomatoes and garlic are softened and cooked, add in the pasta and toss to coat in the sauce. Let the pasta and sauce cook for 2-3 more minutes, until the pasta is cooked all the way through. Add in the mozzarella and basil, mix well and serve. Garnish with additional basil and drizzle with a little balsamic vinegar, if desired. Enjoy!
~ Sara :)
*Basil will brown immediately after cutting it. I recommend cutting it right before adding it to the pasta.
If you follow me on Instagram, then you know that I have had some serious spring fever lately. We've ordered and received most of our seeds for the garden this year (we're planting over 40 different crops this year!) and we finally had a (semi) decent weekend where some things could get done outside. Here is a recap of how we spent the last full weekend of March on our little homestead:
Friday:
The temperature reached almost 70 on Friday! Once Redmond got home from school, I made the kids a smoothie and we headed outside. It was so nice to be able to play and not worry about a coat or a hat.
Redmond spotted a 'butterfly' (after a little research, I learned it is an Eastern Comma Moth) and the kids were both super excited to find multiple frogs at our fish pond. A sure sign of spring!
Saturday:
The forecast was calling for rain all weekend, but thankfully it only rained in the morning on Saturday. So, the kids and I made some brownies while it rained.....and I left my mark in the pan - I'll pass on the edges of the brownies, thanks. #sarawuzhere
Once the rain stopped, Jason headed outside and got busy moving wood. We're re-vamping our fire pit and it was surrounded by wood. We have so much wood, y'all. So, since we have more wood than we know what to do with, Jason decided to use it as part of the fence for our mini-orchard.
The fence looks awesome! Great use of all of that wood - it was just going to be stacked somewhere, might as well make it useful! I'll post more about it once the whole fence is completed around the orchard.
I spent the majority of my day with Alexa, graph paper, Companion Planting for the Kitchen Gardener, and markers. We're making companion planting a priority in our garden this year and I wanted to make a chart of all the crops we're planting and what we can (and can not) plant near them. We will be planning our garden layout soon, and it will be much easier to look at this chart rather than leaf through the book.
Jason also worked on the fence for our garden - we're expanding it this year! He just put a couple posts and pieces of fence up, but we're super excited to make our garden even bigger :)
The kids spent their day running around outside and building/playing Legos inside. But, they were all hands on deck when it came time for dinner - Cast Iron Pizzas!!
Sunday:
Sunday it rained.....and rained....and rained....it was a completely and totally lazy day.....until the afternoon. The rain was intermittent for most of the afternoon so Jason got to work on clearing more wood from around our fire pit. (I'll have a whole before/after post on this project once it's completed).
I became a giddy little girl when I walked by our perennial bed and noticed our garlic had sprouted. GARLIC!!!!!
Not only did the garlic sprout, but all 40 cloves I planted back in the fall sprouted. YAY!!!!!
I had just enough break in the rain to get some of the dead grass and some weeds out of the garlic bed.
The chickens had a pretty good day, too. Between Jason digging up old wood and me weeding the garlic, they got lots and lots of worms to snack on!
The kids had fun using the new fence as a hideout. They found lots of 'bad guys'!
Ashlyn also helped Jason clean up a pile of leaves.
The kids and Jason hung outside a bit more and I headed in to make dinner. I had some extra buttermilk on hand so I decided to make some Buttermilk Biscuits to go with dinner. They were totally worth the time and effort (which, really, wasn't that much)! Will definitely be making these again and you should make them too!
And just like that, it's Monday morning and we're back to the daily grind. Looking forward to many more productive, beautiful weekends ahead on our little homestead. We've got lots of plans and projects ahead of us. Stay tuned!!
I can't even remember the last time I made biscuits by hand. It's been a looooong time. Probably since before I've had my bread maker. Sure, I'll make drop biscuits every once in awhile to throw on top of pot pie, but to actually roll out biscuit dough and cut it out? It's been awhile.
I had some extra buttermilk on hand and have been wanting to try making biscuits in my cast iron, so I decided to give them a try tonight! They weren't perfect - but they were really good, especially with a little Kerrygold butter slathered on them :)
One issue I had was that I rolled the biscuits too thin (which, maybe I wouldn't do if I had this rolling pin - *hint, hint Jason ;) Ultimately, I ended up making two pans of biscuits - one pan I preheated in the oven, the other I did not. Next time I will not preheat the pan. The bottoms of the biscuits weren't burnt, but they were definitely a little more on the "done" side. Overall, these were a hit with the family. They weren't terribly hard to make and baked up nicely. Just look at those layers.....
Buttermilk Biscuits
Makes 12-20, depending on the thickness and size biscuit
Ingredients:
2 1/2 cups self-rising flour
1/2 tsp kosher salt
1/2 cup (one stick) unsalted butter, frozen
1 cup buttermilk, chilled
2 tbsp melted unsalted butter
Directions:
1. Preheat oven to 475. Place the flour and salt in a medium sized bowl and, using the largest holes on your grater, grate the frozen butter into the flour. Gently mix the flour and butter with your fingertips, cover and refrigerate for at least 10 minutes.
2. Remove the flour/butter from the fridge and make a well in the center. Pour the chilled buttermilk into the well and gently mix the batter. (Don't be afraid to use your hands, but work quickly - you don't want the heat of your hands to melt the butter) Once the dough starts to come together, dump it out onto a floured surface. Knead just until the dough comes together.
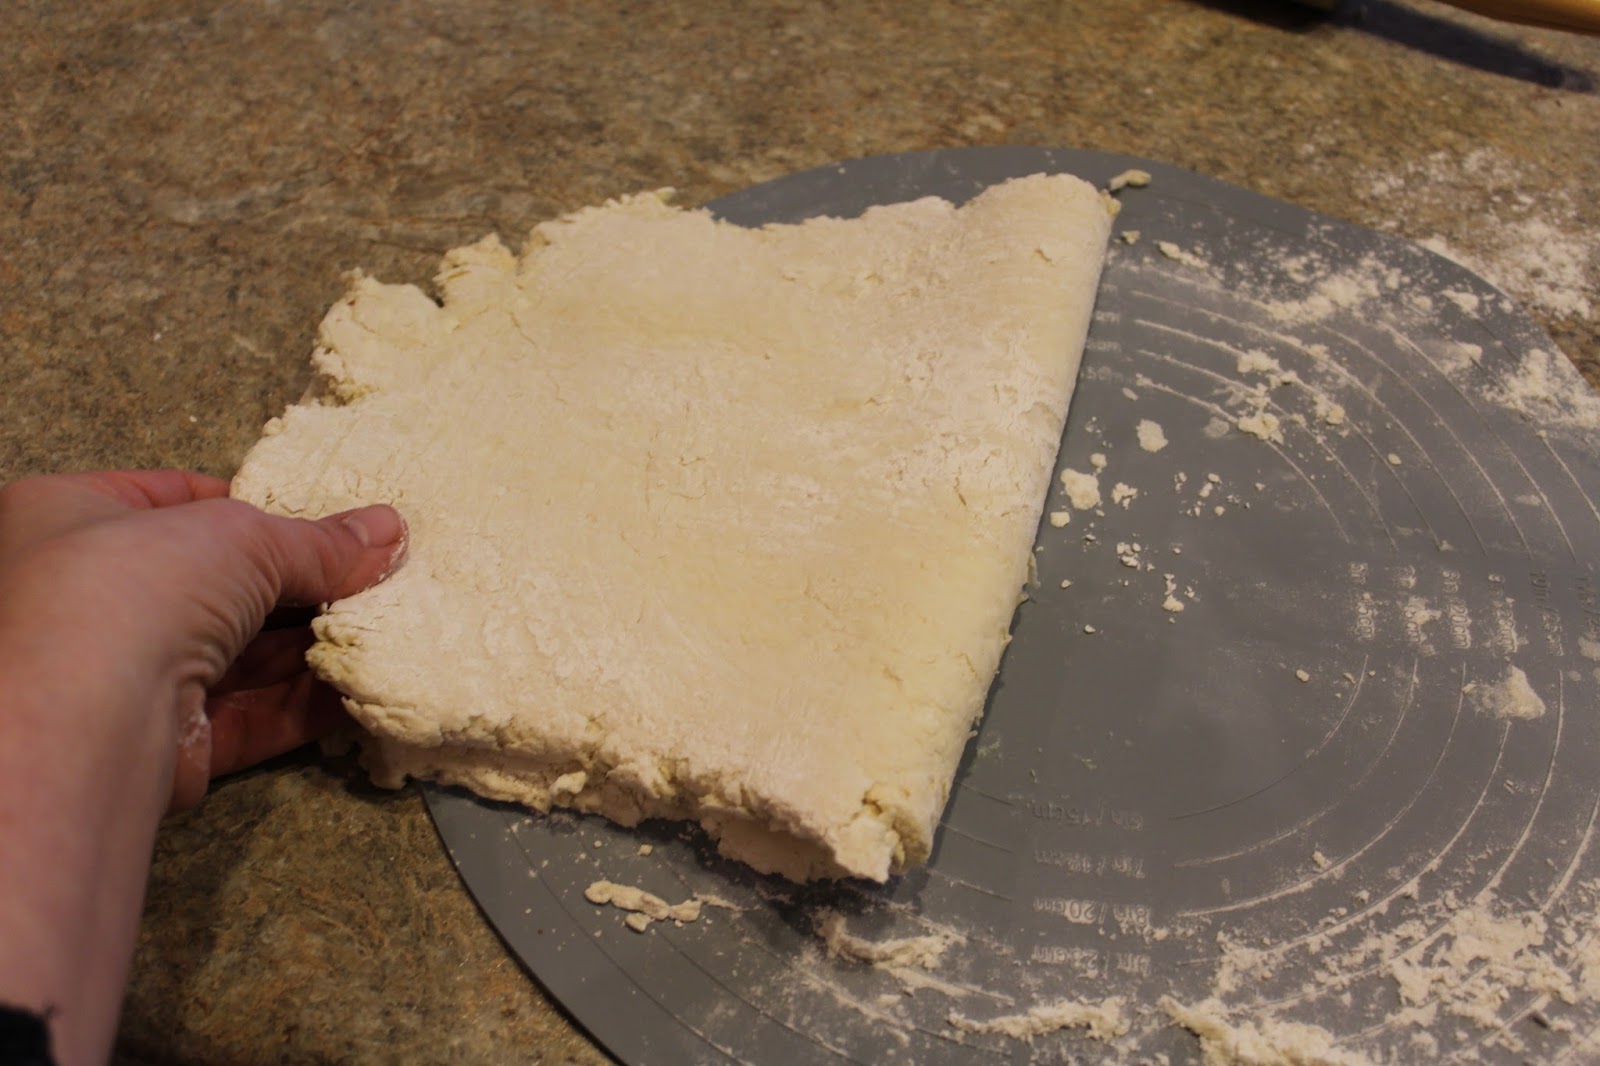
3. Sprinkle the top of the dough with additional flour and generously flour a rolling pin. Roll the dough into a rectangle - approximately 10"x5". Fold the dough in half, bringing one short end to the other. Repeat this process three more times.
4. Once the dough is rolled out and ready, brush the bottom and sides of a 12 inch cast iron skillet with some of the melted butter (you'll only use a little). Using a biscuit cutter, cut the biscuits and place snugly into the prepared pan.
5. Bake the biscuits for 15-25 minutes (depending on size and thickness), until the tops begin to turn golden brown. Remove from the oven and brush with remaining melted butter. Allow to cool slightly and serve. Enjoy!
Wife to the love of my life, mother to 2 adorable kids, 1 fluffy, lazy goldendoodle, and 6 chickens. We are in the process of making our home into a homestead. I'm an animal loving, garden digging, beer drinking, Kombucha brewing, veggie eating, lover of all things natural. Thanks for stopping by!


